How To Curl Your Hair With A Straightener - A Simple Guide
Have you ever looked in the mirror and wished for a quick way to change your hair, maybe adding some soft waves or even tighter, springy curls? It's a common thought, you know, wanting a fresh look without a lot of fuss. For many, the idea of getting those lovely curls might bring to mind a whole collection of tools, like hot rollers that have been around for ages, or perhaps ribbons and special curling wands that promise a certain shape. Well, as a matter of fact, there's a pretty neat trick you can use with something you might already have sitting in your bathroom drawer: your trusty flat iron.
It's true, that flat iron, the one you usually grab to make your hair sleek and straight, can actually be a really helpful tool for creating beautiful curls. It might seem a little odd at first, to use a tool meant for straightening to do the exact opposite, but it's a very effective method. People have been using all sorts of things, from those old-fashioned hot rollers to different kinds of round brushes, to get a bit of wave or curl. But what we're going to talk about here is a way to get those curls using just your flat iron, which is, honestly, a lot simpler than you might think.
This little guide is here to walk you through how to curl your hair with a straightener, step by step. We'll go over everything you might want to know, from getting your hair ready, to picking out the right tools, and even some common little slips people sometimes make. You'll get some helpful suggestions to make sure your curls come out just the way you want them. So, you know, if you're curious about switching up your look and adding some lovely bounce, keep reading. This way of doing things can be a fun and quite effective way to give your hairstyle a fresh feel, allowing you to try out a variety of really nice looks, from those loose beachy waves to more defined, tight spirals, with just a bit of practice, actually.
Table of Contents
- Getting Ready - What Do You Need to Curl Your Hair with a Straightener?
- Preparing Your Hair for Curling
- The Actual Curling Motion
- Finishing Touches and Keeping Your Curls
- What About Different Hair Lengths?
Getting Ready - What Do You Need to Curl Your Hair with a Straightener?
Before you even think about putting heat to your hair, it's pretty helpful to have everything you'll need right there within reach. This makes the whole process smoother and less of a scramble, you know? It's like baking a cake; you wouldn't start without all your ingredients measured out. For curling your hair with a straightener, it's a bit the same. Having your tools ready means you can move from one step to the next without pausing or getting sidetracked. This preparation stage is, in some respects, just as important as the actual curling itself, because it sets you up for success. You want to feel calm and ready, not rushed or searching for things, so planning ahead is a really good idea, actually.
Gathering Your Tools for How to Curl Your Hair with a Straightener
When you're learning how to curl your hair with a straightener, you'll first need to put together a little collection of items. The main thing, of course, is a flat iron, or straightener. Not all flat irons are the same, though; some work a bit better for curling than others. A flat iron with rounded edges tends to be a bit easier to maneuver when you're trying to create those lovely curves. If your flat iron has very sharp, square edges, it might leave little creases in your curls, which is something you generally want to avoid. So, you know, take a look at your flat iron and see if its edges are nice and smooth. Beyond the iron itself, you'll want something to protect your hair from the heat. This is a very important item, as heat can, in a way, be a bit tough on your hair if it's not shielded. You'll also need some hairspray to help those curls stay put once you've made them, and a comb or brush to get your hair ready. A few clips can be quite helpful too, for sectioning off your hair, which makes the whole thing a lot more manageable, really.
Preparing Your Hair for Curling
Once you have all your tools laid out, the next big step is getting your hair ready for the heat. This isn't just about making sure it's clean; it's also about making sure it's in the best possible condition to hold a curl and stay healthy. You want to give your hair a good start before you begin to apply any heat. Think of it like preparing a canvas before painting; you want a smooth, even surface to work on. This preparation will make a real difference in how your curls turn out and how long they last. It’s also about being kind to your hair, giving it a bit of a shield against the warmth it’s about to experience. So, taking a few moments here can really pay off in the end, in fact.
Is Your Hair Ready to Curl with a Straightener?
A very important part of getting ready to curl your hair with a straightener is making sure your hair is completely dry. This is a big one, because using a hot tool on wet or even damp hair can cause some real damage, almost like boiling it, which you definitely don't want. So, take your time and make sure every strand is dry, dry, dry. You can let it air dry, or use a blow dryer, but just be sure it's fully without moisture. After that, you'll want to put on a heat protectant product. This is a must-do step, seriously. It creates a sort of shield between your hair and the heat from the flat iron, helping to keep your hair looking good and feeling healthy. You just spray or smooth it through your hair, making sure to get good coverage from the roots to the ends. It helps to keep your hair from getting too hot and, you know, looking a bit fried. This simple step can really make a difference in the health and appearance of your hair over time, actually.
Once your hair is dry and protected, it's a good idea to give it a good brush or comb through. You want to get rid of any tangles or knots. Smooth hair is much easier to work with, and it helps the flat iron glide through without snagging. If your hair is tangled, the iron might pull on it, which isn't very comfortable and can also make your curls look uneven. So, a nice, smooth base is what you're aiming for. After brushing, you might want to section your hair. This makes the curling process much more manageable, especially if you have a lot of hair or very long hair. You can use hair clips to separate your hair into smaller, more workable parts. Typically, people start with the bottom layers and work their way up, so you might clip the top half of your hair out of the way. This just makes it easier to focus on one section at a time, ensuring that you don't miss any spots and that each curl gets the attention it needs, which is pretty helpful, really.
The Actual Curling Motion
Now, this is where the fun really begins – the actual act of turning those straight strands into lovely curls. It might seem a little tricky at first, using a straightener for curls, but it's more about getting the right motion down. Once you get the hang of it, it becomes quite natural, like riding a bike. The key is to understand how the flat iron interacts with your hair to create that bend. It’s not just about clamping down; it’s about a smooth, continuous movement that encourages your hair to take on a new shape. You'll find that with a bit of practice, you can get a really good feel for it, and then it’s pretty simple to do, you know.
Different Ways to Curl Your Hair with a Straightener
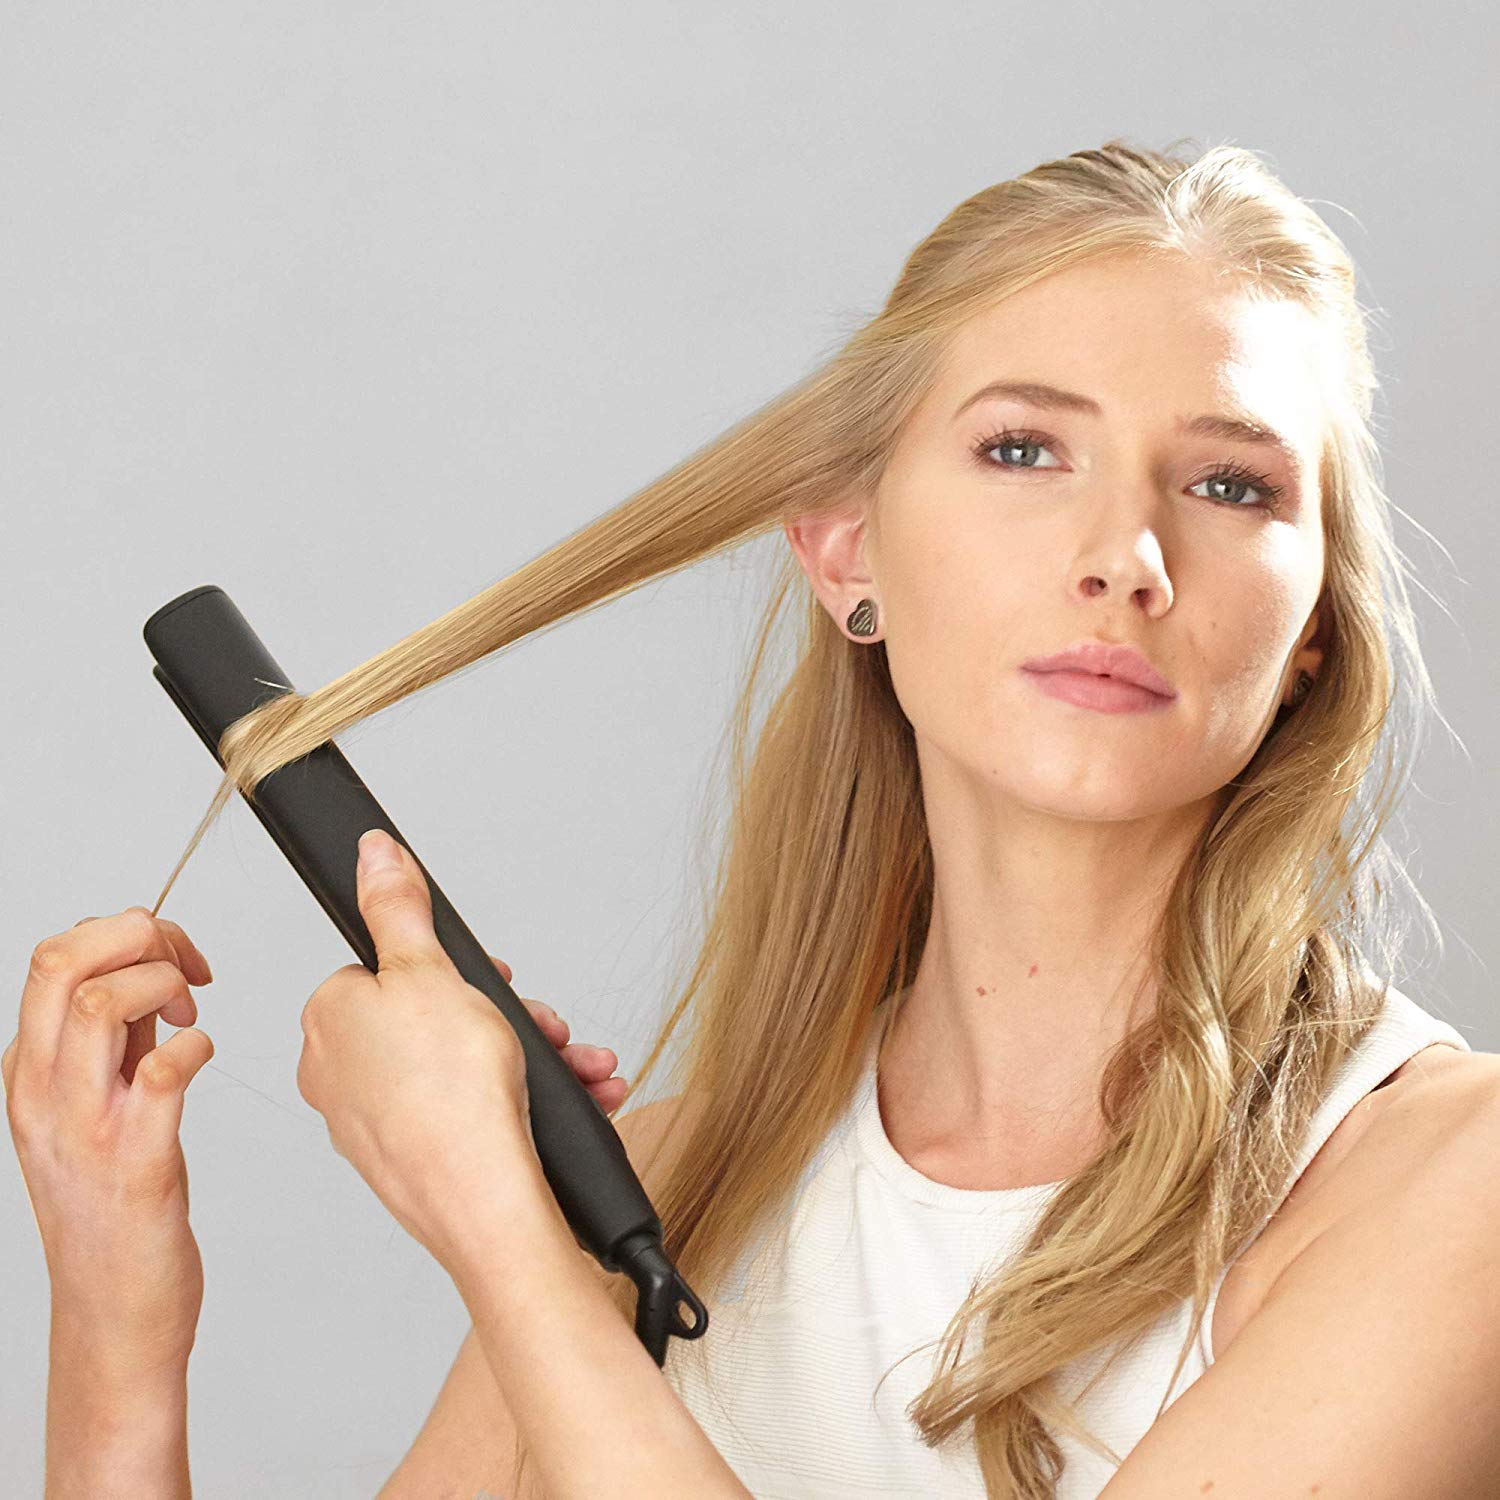
There are a few different ways you can go about curling your hair with a straightener, and the exact method can change the kind of curl you get. For a classic curl, you'll want to take a small section of hair, maybe about an inch or so wide. Open your flat iron and clamp it down near the roots of that section. Now, this is the important part: once it's clamped, you need to turn the flat iron a half-turn away from your face. So, if you're curling the right side of your head, you'd turn it to the right. If it's the left side, you'd turn it to the left. Once you've twisted it, slowly pull the flat iron down the length of your hair, keeping that half-turn motion consistent. The slower you pull, the more defined the curl will be. If you pull it a little faster, you might get more of a wave. It's almost like painting, where the speed of your brush stroke changes the effect, you know? This technique, when done correctly, will produce a nice, soft curl that looks quite natural, actually.
For something like beach waves, which are a bit looser and more relaxed, you might try a slightly different approach with your straightener. Instead of a full half-turn and a slow pull, you can do more of a "bend and release" motion. You'd clamp the hair, twist the iron a little, then slide it down a short distance, then twist it the other way and slide it down again. It's more of an S-shape movement down the hair, rather than one continuous twist. This creates a softer, more undone wave, which is pretty popular. Another thing to consider is the size of the hair section you pick. Smaller sections tend to give you tighter curls, while larger sections will result in looser waves. So, if you're aiming for those really tight, bouncy curls, you'll want to work with smaller bits of hair. If you prefer a more relaxed, wavy look, you can take slightly bigger sections. It's all about playing around with it a bit to see what works best for the look you're trying to get, and that's part of the fun, really.
Remember, the angle at which you hold the straightener can also make a difference. Holding it horizontally will give you a more voluminous curl, while holding it vertically will create a looser, spiral effect. You can also experiment with how much hair you leave out at the ends. If you want a more natural, undone look, you might leave the last inch or so of your hair out of the flat iron's grip. This creates a straighter end to the curl, which is a common look for those relaxed waves. On the other hand, if you want a curl that goes all the way to the very tip of your hair, you'll want to make sure the straightener goes all the way down. It's about finding what feels right for your hair and the kind of style you're hoping to achieve. You know, it takes a little bit of getting used to, but it's quite simple once you've practiced a few times, so don't worry if it's not perfect on your first try, honestly.
Finishing Touches and Keeping Your Curls
Once you've gone through all your hair and created those lovely curls, you're not quite done yet. The final steps are about making sure those curls look their best and stay put for as long as you want them to. It’s a bit like putting the icing on a cake; it really finishes things off. Without these last touches, your curls might fall flat or lose their shape a lot faster than you’d like. So, taking a moment for these finishing touches is pretty important for getting the most out of your hard work. You want your curls to have that nice, polished appearance, and to last through your day or evening, you know.
How to Keep Your Curls Looking Good After Curling with a Straightener?
After you've finished curling all the sections of your hair, resist the urge to immediately run your fingers through them. Letting the curls cool down for a few minutes is a really good idea. As they cool, they set into their shape, which helps them last longer. If you touch them too soon, you might pull them out and lose some of that bounce. Once they've cooled, you can gently separate them with your fingers if you want a softer, more natural look. Don't use a brush, as that will likely turn your curls into a wave or even straighten them out. Just use your fingers to gently pull them apart, creating a bit more volume and a less "perfect" look, which is often what people are going for, actually. This step is about creating the overall shape and fullness you desire, so take your time with it, you know.
To help your curls stay in place, a light mist of hairspray is generally a good idea. You don't want to use too much, though, as that can make your hair feel stiff or crunchy, which isn't very pleasant. A light, even spray all over will help to hold the curls without making them feel heavy. You can also flip your head upside down and give a quick spray underneath for a bit more lift and volume, then flip it back up and arrange your hair how you like it. This helps to make sure the hairspray gets to all parts of your hair, giving your curls a bit of extra staying power. It's about finding that balance between holding the curl and keeping your hair feeling soft and movable. So, you know, a little bit goes a long way here, really.
Sometimes, after curling, you might want to create a specific upstyle, like a messy bun or a loosely gathered chignon. Curling your hair with a straightener is, in fact, often the very first step if you’re going to put your hair up in one of these styles. The flat iron will give your hair a nice base texture, making it easier to gather and pin into place. The curls provide volume and a soft, pretty look to the upstyle, rather than just pulling straight hair back. So, even if your end goal isn't to wear your hair down in curls, the straightener can still be a really helpful tool for adding that initial movement and body that makes an updo look much more interesting and, you know, a bit more put together, actually.
What About Different Hair Lengths?
You might be wondering if curling your hair with a straightener works for all hair lengths. The good news is, it pretty much does! While the technique remains similar, there are a few little adjustments you might make depending on whether your hair is short, medium, or long. The basic idea of clamping, twisting, and pulling is the same, but the way you approach each section and the kind of curl you aim for can be a bit different. It's about adapting the tool to what your hair can do, which is pretty neat, you know.
For those with shorter hair, you can still get some lovely effects with a straightener. With short hair, we can, for example, just flick out the ends or the bangs to provide a more textured, tousled look. You might not be able to get full, bouncy spirals, but you can certainly add some movement and shape. A quick flick of the wrist as you pull the straightener through a small section can give a nice bend to the ends, making your bob or pixie cut look a bit more playful and styled. It's about using the tool to add a bit of personality to your shorter cut, rather than trying to create a full curl, which might be a bit tricky with less length to work with. So, you know, even short hair can benefit from this technique, actually.
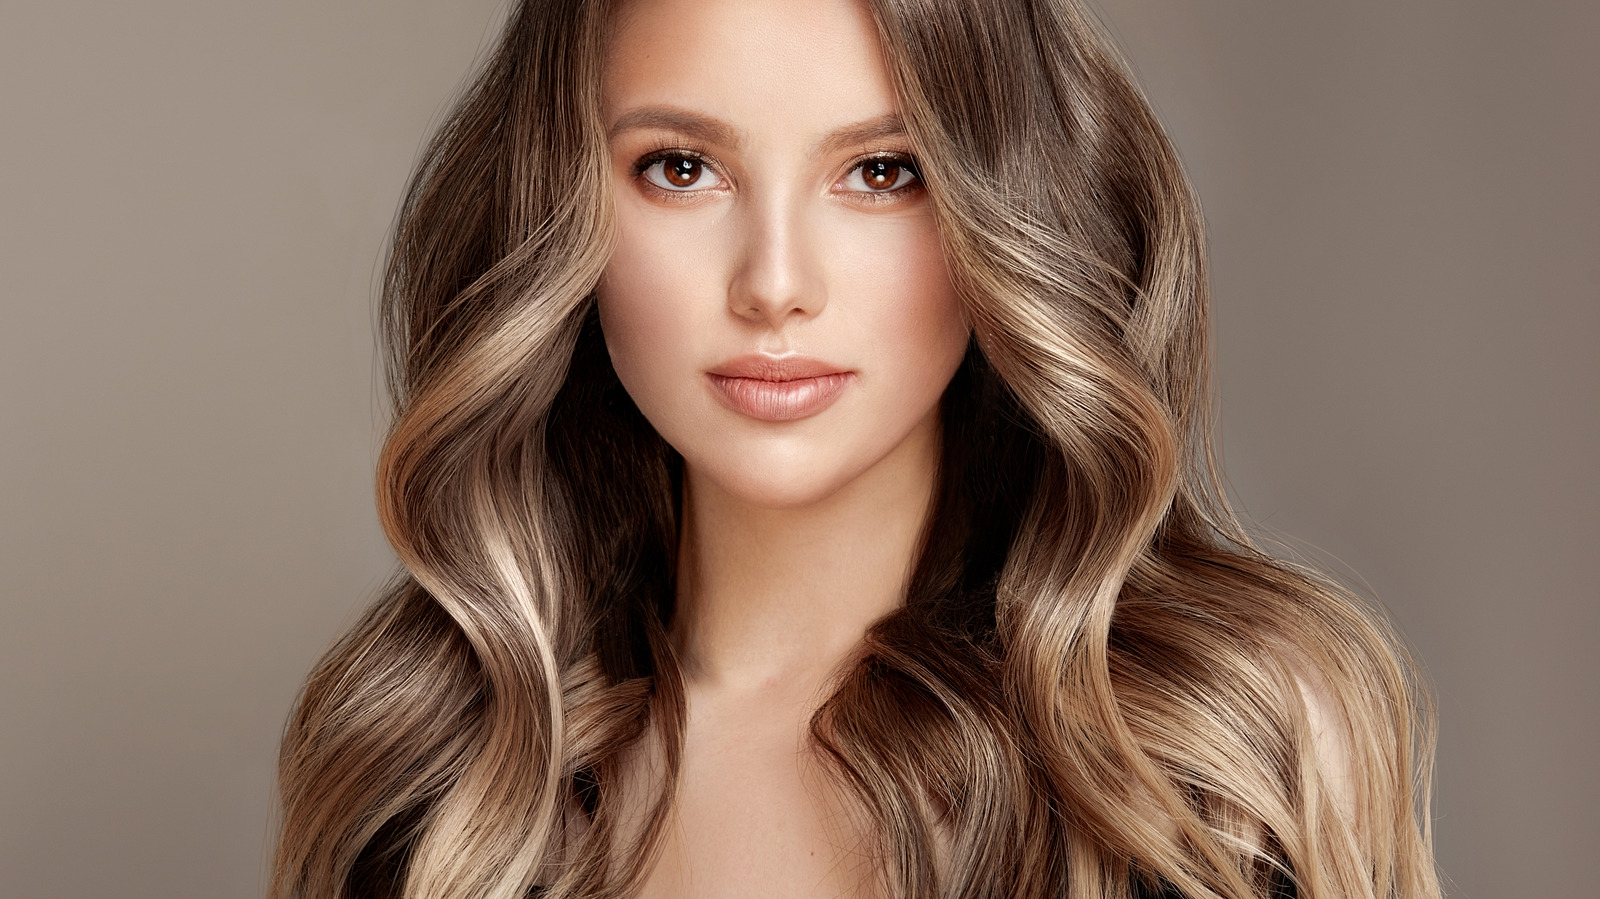
If you have medium-length hair, you're in a pretty good spot for creating a wide range of curls, from soft waves to more defined spirals. You have enough length to really work the straightener around the hair section and create a good, consistent curl. This length is, in some respects, very versatile for flat iron curling. You can experiment with different section sizes and pulling speeds to see what kind of curl you like best. For longer hair, the process is much the same, but it will naturally take a bit more time because you have more hair to go through. You'll want to make sure you're taking consistent section sizes to keep your curls looking even all over your head. Longer hair can hold beautiful, flowing waves or big, glamorous curls when done with a straightener, which is pretty nice. The main thing is patience and making sure each section gets the attention it needs to form a good curl, so, you know, take your time with it, really.
- The Strand House Manhattan Beach
- Landmark Pasadena Playhouse
- Florida Cracker Kitchen
- Manor College
- Regal Cinebarre West Town Mall
Best Hair Styling Tools to Curl Hair - RevampHair.com
It's Time To Learn Once And For All How To Curl Your Hair With A

Curling Hair 101: Easy Techniques For Beginners | ShunSalon
